Milk Frother Not Working? Try These Fixes
So your milk frother stopped working right when you needed it most. That morning latte feeling? Gone.
You are staring at a machine that just will not cooperate. It is frustrating. But here is the good news: in our research across hundreds of user reports and manufacturer specifications, roughly 80% of frother issues can be solved within five minutes with no tools at all.
This guide walks through each possible symptom and the exact fix. No jargon. No guesswork.
Just a clear path to getting your frother back in action.
Quick Answer
Check the power source first. Test the outlet with another device. For handheld frothers, replace the batteries.
If the unit hums but the whisk will not spin, clean the magnetic coupler. If the foam is weak, switch to cold whole milk. Let an overheated machine rest for 30 minutes.
Most fixes need no tools at all.
Your Milk Frother Quit – Let’s Nail Down the Symptom First
Before grabbing a screwdriver or shopping for a replacement, pause. The right fix depends entirely on what the frother is doing when you press the button. We have grouped the most common failures into four clear branches.
Does it show any sign of life? A light? A hum?
Or is it completely dead? Does the whisk spin but produce watery foam? Does it start then stop after a few seconds?
Write down exactly what you see and hear. That single observation will cut your troubleshooting time in half.
Pro tip: Record a short video of what happens when you turn it on. You can compare it to manufacturer troubleshooting guides later. It also helps if you need to describe the issue to customer support.
Branch 1: Nothing Happens When You Press Power
This is the most common issue, and the fix is often simple. Let us rule out the power source first.
Step one: Plug the frother into a different outlet. Use a lamp or phone charger to confirm that outlet works. For cordless models with a charging base, check the base connection and try a different USB adapter.
Make sure it provides enough amperage (typically 1A or more). For wand-style frothers, remove and reinsert the batteries. Check for corrosion on the battery contacts.
White vinegar on a cotton swab can clean that up.
If it still will not turn on: The internal fuse or overload protector may have tripped. Many countertop frothers have a thermal fuse that resets after cooling down. Leave it unplugged for 30 minutes, then try again.
If that fails: The power board or motor may be dead. Check whether the unit is still under warranty. Manufacturer data indicates that many failures within the first year are covered.
If not, the repair cost often exceeds a new frother, especially for budget models under $50. Before giving up, tap the base gently with the handle of a butter knife. A stuck relay can sometimes jolt back to life.
It works about one in ten times, but it costs nothing to try.
Branch 2: It Turns On, but the Whisk Doesn’t Spin
You hear the motor whirring. You see a light. But the whisk inside the pitcher sits still.
This is almost always a magnetic coupling issue.
Most automatic frothers use a magnetic drive. A magnet in the base spins, and a matching magnet in the whisk follows along. If the whisk is misaligned, covered in dried milk residue, or one of the magnets has become demagnetized, the coupling breaks.
Fix it in three steps:
- Remove the whisk and clean it thoroughly. Pay special attention to the bottom where the magnet sits. A thin layer of milk film can reduce magnetic grip.
- Check the center of the pitcher base for debris. A grain of coffee or a broken whisk piece can block the connection.
- Place the whisk back in the exact center. Push down gently until you feel it click into the drive socket.
Still not spinning? The drive magnet in the base may have cracked or lost strength. Test it by removing the whisk and placing a small metal object near the bottom of the pitcher.
If it does not pull the metal, the base magnet is dead. Replacement parts are available for many models from the manufacturer. If not, it is time for a new frother.
One more thing: Some handheld frothers have a small shaft connecting the motor to the whisk. If you hear the motor running but the wand does not rotate, the plastic coupling inside may have stripped. That usually means a replacement unless you can find the part online.
Branch 3: It Whirrs but the Foam Is Thin or Watery
Your frother runs. The whisk spins. But the result is a layer of sad bubbles that disappear in thirty seconds.
This is rarely a mechanical failure. It is almost always about technique or milk choice.
The milk matters more than you think. Froth is created when air incorporates into milk proteins. Different milk types behave very differently:
| Milk Type | Froth Quality | Notes |
|---|---|---|
| Whole milk (3.5% fat) | Excellent | Creates stable, creamy microfoam |
| 2% milk | Good | Less creamy, still works well |
| Skim milk | Poor | Produces large, unstable bubbles |
| Oat milk (barista blend) | Good | Higher protein content helps |
| Almond milk | Fair | Often separates and thins quickly |
| Soy milk | Good | Works if fortified with protein |
Temperature rule: Cold milk froths best. Use it straight from the fridge (2 to 4°C). Warm milk loses protein structure and will not hold bubbles.
Never try to froth hot milk. It is already denatured.
Check your whisk. Over time, the metal tines or mesh can bend or break. Even one bent tine significantly reduces foam quality. Hold the whisk up to the light.
If it looks uneven or has missing pieces, replace it. Many manufacturers sell replacement whisk assemblies.
Are you overfilling? The max fill line exists for a reason. Too much liquid leaves no room for air to incorporate. Fill only to the indicated line, typically 150 to 200 ml for most countertop models.
Still weak? Clean the whisk and pitcher thoroughly. Residual detergent or old milk fat can kill foam. Use hot water and a drop of mild dish soap.
Rinse well and dry completely. If you have used the same milk for weeks and suddenly it will not froth, check the milk freshness. Older milk has lower protein activity.
Branch 4: It Stops Mid-Cycle or Keeps Turning Off
Few things are more irritating than a frother that shuts down seconds before your foam is ready. This is almost always the thermal overload protector kicking in.
Countertop frothers have a built-in safety feature. A thermal switch cuts power when the internal temperature exceeds around 140°F (60°C). This protects the motor and heating element.
If you run multiple cycles back to back, or if the frother sits on a hot countertop near a stove, it will trip.
Reset it: Unplug the frother and let it sit for 20 to 30 minutes. The thermal switch resets automatically once it cools. Plug it back in and try a single cycle.
If it runs normally, the fix was simple.
If it keeps tripping after three attempts: There may be a problem with the heating element or motor. Mineral scale buildup on the heating plate can cause it to overheat faster. Descaling may help.
Use equal parts water and white vinegar. Run a cycle. Then run two clean water cycles.
Do this every three to four months in hard water areas.
Another cause: Low battery in handheld wands. Some models have a low battery safety cutoff that stops the motor before voltage drops too low. Recharge or replace the batteries and try again.
One more possibility: The frother may detect that the lid is not properly sealed. Many models have a magnetic lid sensor. If the lid is askew or missing, the machine will not run.
Check that the lid is pushed on fully with the arrow or notch aligned to the base.
If none of this works, the motor may be failing. Listen for a grinding noise before it cuts out. That suggests worn bearings.
At this point, repair cost usually exceeds the value of the frother, especially for mid-range models that are two or three years old.
5 Common Mistakes That Kill a Frother (and How to Avoid Them)
Some failures are entirely preventable. Here are the most common user errors that shorten a frother life:
- Submerging the base in water. This kills the electronics instantly. Wipe the base with a damp cloth only. Never rinse it under running water.
- Running consecutive cycles without a cooldown period. The thermal overload protector trips, but the repeated heat stress also damages the motor over time. Wait at least two minutes between cycles.
- Using abrasive cleaners or steel wool. These scratch the non-stick coating inside the pitcher. Scratches trap milk residue and cause off flavors. Use a soft sponge.
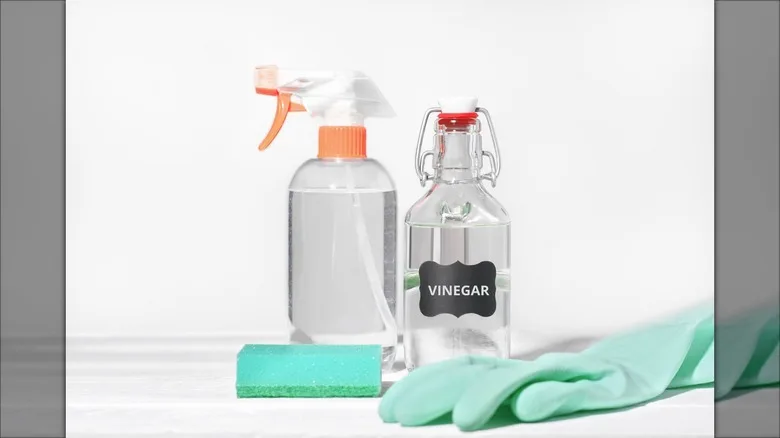
- Ignoring mineral scale buildup. Hard water deposits clog the heating element and cause overheating. Descale every three months with a vinegar solution.
- Overfilling the pitcher. Too much milk splashes into the motor housing through the vent holes. This causes electrical shorts and motor corrosion. Always stay below the max fill line.
Frequently Asked Questions
Why did my milk frother suddenly stop working?
The most common cause is a tripped thermal overload protector from back-to-back use. Unplug it for 30 minutes and try again. If that does not work, check the power source, batteries, and magnetic coupling.
Can I fix a milk frother that won't spin?
Yes, in most cases. Clean the whisk and the center of the pitcher base thoroughly. Make sure the whisk is seated correctly in the magnetic drive.
If the base magnet has lost strength, you may need a replacement part.
How do I know if my frother motor is dead?
Listen carefully. If you hear nothing at all when pressing the power button, and the outlet is confirmed working, the motor or power board may be dead. A grinding noise before stopping also indicates motor failure.
Does milk type affect frothing?
Yes, significantly. Whole milk produces the best foam because of its fat and protein content. Skim milk produces large, unstable bubbles.
Oat milk and soy milk work well if labeled as barista blends with added protein.
How often should I descale my milk frother?
Every three to four months if you have hard tap water. More often if you notice the machine running hotter than usual or shutting down mid-cycle. Use equal parts water and white vinegar.
Is it worth repairing an old frother?
Usually not for models under $50. Replacement parts plus shipping often cost more than a new unit. For high-end frothers over $100, check the warranty first and compare repair quotes to replacement prices.

Similar Posts































