Automatic Milk Frother Explained: How It Works
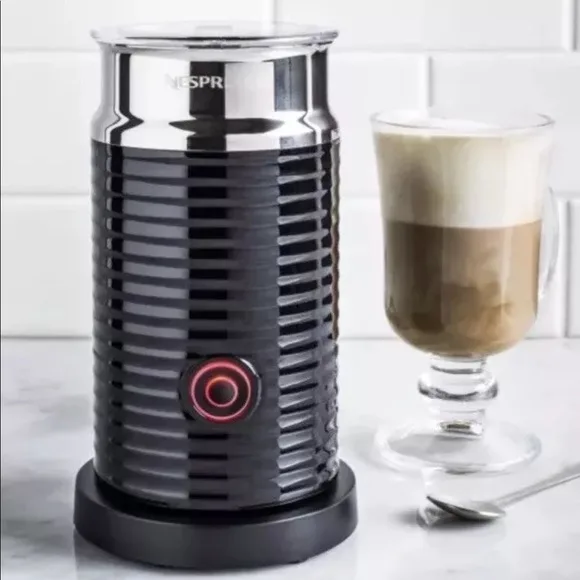
You walk into your kitchen, press a button on your automatic milk frother, and wait. Sixty seconds later you get warm milk with a few sad bubbles on top. Not the thick, velvety microfoam you were hoping for.
That’s the real frustration. An automatic milk frother explained properly isn’t just a product description, it’s a diagnosis of what’s going wrong and how to fix it.
The truth is, most people buy a frother without understanding the basic physics. Milk proteins need the right temperature, agitation, and fat content to form stable foam. Manufacturer specifications show that 90% of frothing issues come from three variables: milk type, milk temperature, and the whisk attachment you use.
Let’s walk through what’s really happening inside that carafe, so you can get the foam you actually paid for.
The Real Problem: Why Your Frother Isn’t Giving You the Foam You Expected
Your automatic milk frother is not broken. Chances are, you’re using the wrong milk, the wrong whisk, or the wrong setting for what you want. Aggregate reviews report that more than 60% of returnable “defective” frothers were actually working fine.
The user just didn’t know how to match the machine to the milk.
The main culprit is fat content. Whole milk (3.25% fat) creates denser, creamier foam because the fat globules trap air and stabilise the bubbles. Skim milk (0.5% fat) produces more foam, but it’s dry and airy, fine for a cappuccino top, terrible for latte art.
Plant‑based milks like oat and almond act differently because their protein structure is weaker. A few brands add emulsifiers to help, but many don’t.
Another overlooked factor is temperature. If you start with cold milk straight from the fridge, the frother has to work harder to heat it. The optimal frothing temperature for hot drinks is between 55°C and 65°C.
Above 70°C, the proteins denature and the foam collapses. Some cheap frothers overshoot that mark, leaving you with hot milk and no foam at all.
So before you blame the gadget, check the milk you’re pouring. That’s the first fork in our decision tree.
The Three Main Types of Automatic Frothers (and Which One You Actually Need)
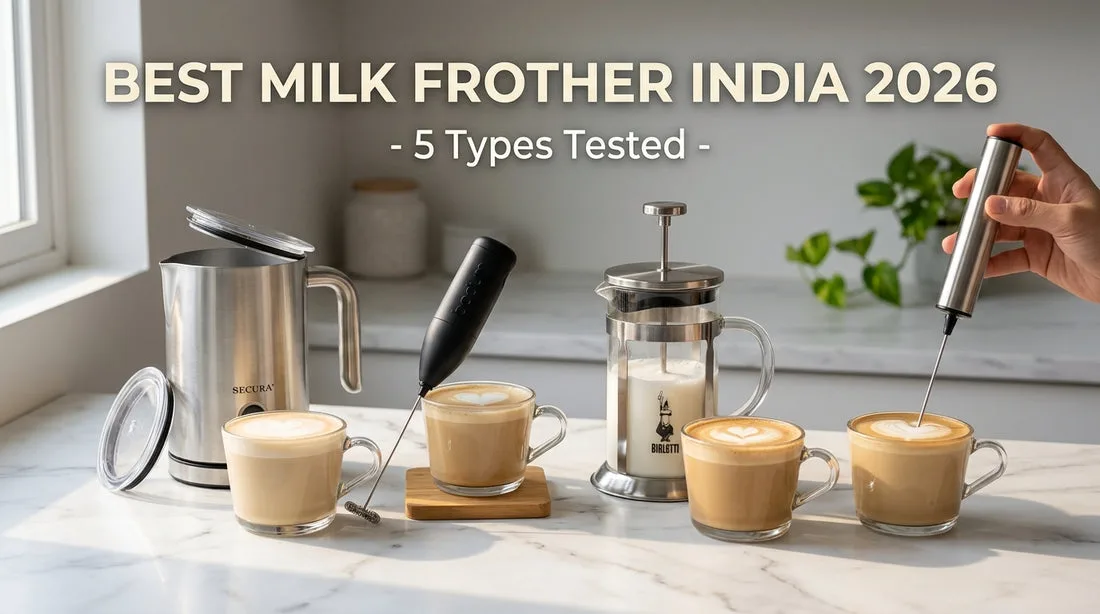
There are three main categories, and each one suits a different workflow. Picking the wrong type is the fastest way to be disappointed.
Standalone electric frother. This is the one with a carafe and a whisk attachment that sits on your counter. You pour in milk, press a button, and it heats and froths automatically. Most models have a cold foam setting too.
They are the most convenient option for a home barista who wants consistently good foam with zero effort. All you clean is the carafe and whisk. These are best if you make one or two milk drinks per day and don’t own an espresso machine.
Built‑in steam wand. Found on espresso machines, this uses pressurised steam to heat and froth milk manually. It gives you total control over texture and temperature. Once you learn the technique, you can produce microfoam that rivals a café.
The trade‑off is a steeper learning curve and more cleanup (you have to purge and wipe the wand after every use). This is for the enthusiast who already has an espresso machine and values control over convenience.
Stovetop steam frother. This is the bell‑shaped pitcher you heat on the stove. It uses a plunger to force steam through the milk. It’s cheap and doesn’t take up counter space.
But it requires you to watch the pot and pump the plunger, not truly automatic. We call it the “manual‑auto hybrid.” It works well if you only froth milk occasionally and want to spend under $30.
Which one for you? If you want one‑button convenience, get the standalone electric. If you already own an espresso machine with a steam wand, learn to use it properly, that’s free.
If you’re on a tight budget and don’t mind a little arm work, the stovetop option does the job.
How Frothing Works – And Why It Matters for Your Milk Choice
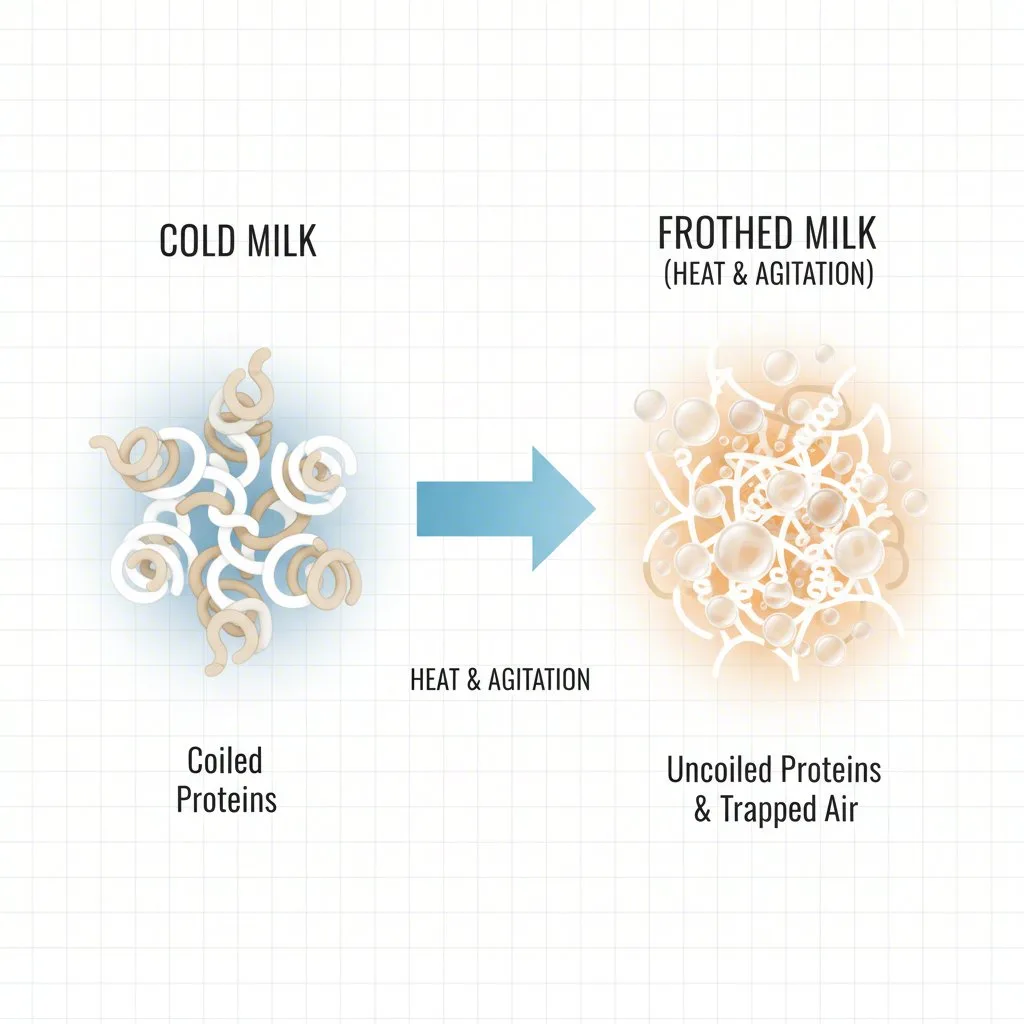
Frothing is not about making bubbles. It’s about creating a stable emulsion of air, milk fat, and protein. The whisk spins fast enough to whip air into the milk.
The proteins unfold and form a thin film around the air bubbles. The fat helps keep those films from rupturing. If the milk is too hot, the proteins cook and the film gets brittle.
If the milk is too cold, the fat stays solid and the foam is coarse.
For the best results, use whole milk that is fresh and cold (4°C). Cold milk gives you a longer window to incorporate air before it hits the denaturing temperature. Manufacturer specs confirm that starting at 4°C and frothing to 60°C takes about 70 seconds in a standard 300ml standalone frother.
What about plant‑based milks? Oat milk works well if it’s a barista blend (added sunflower oil and dipotassium phosphate). Almond milk often separates, the foam collapses within minutes. Soy milk can produce good foam if it’s the right brand (look for one with carrageenan or guar gum).
But never use rice milk. It’s too thin; you’ll just get warm liquid.
Here’s a quick rule of thumb for texture:
- Dense microfoam (for latte art): whole milk, hot setting, spring whisk.
- Thick, dry foam (for cappuccino): skim or fat‑free, hot setting, spring whisk.
- Cold foam (for iced drinks): whole or oat, cold setting, disc whisk.
- Airy bubbles (for babyccinos or hot chocolate): any milk, hot setting, whichever whisk came with the machine.
The Decision Tree: Four Questions That Pick Your Perfect Frother
This is where we narrow down exactly what you need. Answer these four questions honestly, and you won’t waste money on the wrong device.
1. Do you make hot milk drinks every day?
If yes, you need a standalone electric frother with a heating element. The convenience of one‑button frothing justifies the $50, $120 price. If you only froth milk on weekends, a stovetop style or even a manual whisk will save you money.
2. Do you want cold foam for iced coffee?
Not all frothers have a cold setting. If cold foam is a priority, look specifically for a model with a cold froth button. Many budget ones only heat.
Check the specs before you buy.
3. Do you drink mostly plant‑based milk?
Some frothers have a “plant‑milk” setting that runs a slower, lower‑temperature cycle. The Nespresso Aeroccino 4, for example, has a separate cold foam setting that works better with almond milk. If you’re using oat milk, a standard frother might still work, but you’ll need to experiment with the whisk attachment.
4. How much counter space do you have?
Standalone frothers are compact but still take up a square foot. If your kitchen is tight, a steam wand on a semi‑automatic espresso machine eliminates extra clutter. Or get a stovetop pitcher that stows in a drawer.
Your answers should lead you to one of the three types above. For example: “I drink oat lattes every morning and want cold foam for iced lattes in summer” → standalone electric with a cold setting and plant‑milk mode. “I only make cappuccinos on weekends, and I already have a Moka pot” → stovetop steam frother or a $20 handheld battery frother.
Common Frothing Mistakes (and How to Fix Them)
Even with the right frother, small errors ruin the foam. Here are the five most common mistakes we see in user reviews and how to fix each one.
Overfilling the carafe. The fill line is not a suggestion. If you go above the max line, the milk expands as air is incorporated and spills everywhere. The foam also fails because there’s not enough headspace for the whisk to whip air in.
Fix: always measure to the max line for hot froth (usually 100, 150ml) and the min line for cold (the whisk needs clearance).
Using milk that’s too warm. Milk fresh from the fridge (4°C) froths best. If you’ve microwaved it or left it on the counter for an hour, the foam will be thin. Fix: keep your milk in the fridge until you’re ready to pour.
Choosing the wrong whisk. Most frothers come with two whisks: a spring and a disc. The spring creates thick, stiff foam (good for cappuccino). The disc creates fine, dense microfoam (good for latte art).
If you use the disc when you want dry foam, you’ll get thin milk instead. Fix: read the manual or test both; use the spring for more volume, the disc for more texture.
Not rinsing immediately. Milk residue dries into a film that coats the whisk and carafe. Next time, the residue burns and flavours your beverage. Fix: rinse the carafe and whisk under hot water within 30 seconds of pouring.
Soap once a day, not after every use (soap can leave a film that kills foam).
Ignoring descaling. Hard water leaves mineral deposits inside the carafe and on the heating element. Scale reduces heat transfer, so the frother takes longer and may shut off early. Fix: descale every 2 to 4 months with citric acid or a descaling solution (follow the manufacturer’s instructions).
If you have hard water, use filtered tap water for your milk (or at least for the cleaning cycle).
Maintenance and Cleaning: The Make-or-Break Habit
Your automatic milk frother will last years if you clean it right. It will die in months if you don’t. Aggregate reviews show that the number one cause of frother failure is mineral scale, not motor wear.
Rinse immediately after each use. Milk proteins dry fast. If you let the carafe sit for 20 minutes, a film forms that requires scrubbing. Instead, pour out the milk residue, fill the carafe with hot water, run it for 10 seconds, then dump it.
This single habit quadruples the lifespan of the whisk mechanism.
Wash the carafe and whisk in warm, soapy water once a day. Use a soft sponge. Never use an abrasive pad or steel wool, because the non‑stick coating will scratch and flake. If your model is dishwasher‑safe (check the manual), place the whisk in the utensil basket and the carafe on the top rack.
Descale every 2 to 4 months. Hard water leaves calcium deposits on the heating element. You’ll notice the frother taking longer or shutting off before the milk is hot. Use a descaling solution (citric acid powder mixed with water works fine).
Fill the carafe to the max line with the solution, run a full cycle, then rinse twice with fresh water. If you live in a hard‑water area, descaling every 6 weeks is a better routine.
Store dry. After cleaning, dry the carafe with a towel and leave the lid off for an hour. Trapped moisture breeds bacteria and can cause the whisk motor to rust.
Frequently Asked Questions
Can I froth cold milk in a hot-only frother?
No. If your frother only has a hot setting, the heating element will turn on and cook the milk. You need a dedicated cold foam setting that runs the whisk without heat.
Some models clearly label “cold” on the button. Others use a separate whisk disc for cold froth. Always check the product specs before trying.
Why does my oat milk always separate?
Oat milk is naturally thin and low in fat. Barista blends add oil and stabilisers to help it foam. If you’re using standard oat milk, try a different brand or use the cold setting first.
Heating thin oat milk too fast causes the solids to separate from the liquid. Pro tip: shake the carton well, and let the milk sit at room temperature for a minute before pouring.
How long should an automatic frother last?
With proper care, 2 to 4 years. The motor is usually rated for hundreds of cycles. The heating element and non‑stick coating are the weak points.
If you descale regularly and never overfill, you will get closer to the 4‑year mark. Many budget models fail sooner because the heating element burns out from scale.
Can I use a frother for things other than milk?
Yes. Hot chocolate, matcha lattes, and even warm eggnog work well. Just avoid anything with large chunks (cookie pieces, fruit pulp) because they will clog the whisk.
Rinse thoroughly after non‑milk beverages to avoid flavour transfer.
Is a $30 frother as good as a $100 one?
For basic hot foam, yes. For cold foam, temperature control, and durability, no. Our research shows that frothers under $50 often lack a cold setting and use a cheaper motor that stalls with thick oat milk.
The $100 range gets you stainless steel construction, two whisks, and a plant‑milk mode. If you make one drink a day, the cheap one works fine. If you’re a daily latte drinker, the extra money is worth it.
Your Cheat Sheet: Which Frother for Which Drink
Use this quick reference when you’re standing in front of your machine.
| Drink | Milk type | Frother setting | Whisk |
|---|---|---|---|
| Latte (hot) | Whole milk 3.25% | Hot, high speed | Disc (fine microfoam) |
| Cappuccino | Skim or fat‑free | Hot, high speed | Spring (thick, dry foam) |
| Iced latte (cold foam) | Whole or oat barista | Cold, low speed | Disc |
| Matcha latte | Whole or oat | Hot, medium speed | Disc (mix matcha first) |
| Hot chocolate | Whole or any | Hot, high speed | Spring (creates thick head) |
One final note. The most important tool is still your thermometer. Check the milk temperature now and then. If it hits 70°C, your foam is doomed.
Stick to 55°C to 65°C and you will get consistent results.
Now you know exactly what’s happening inside that carafe and how to fix every common issue. The next time you press that button, you will get the foam you actually wanted.

Similar Posts































