Why Oat Milk Won’t Froth & How to Fix It
You’ve got your oat milk, your espresso machine, your favorite mug. You’re ready for a creamy latte. But you steam the milk and nothing happens.
Flat liquid. A few sad bubbles. That’s the moment you ask yourself: why won't my oat milk froth?
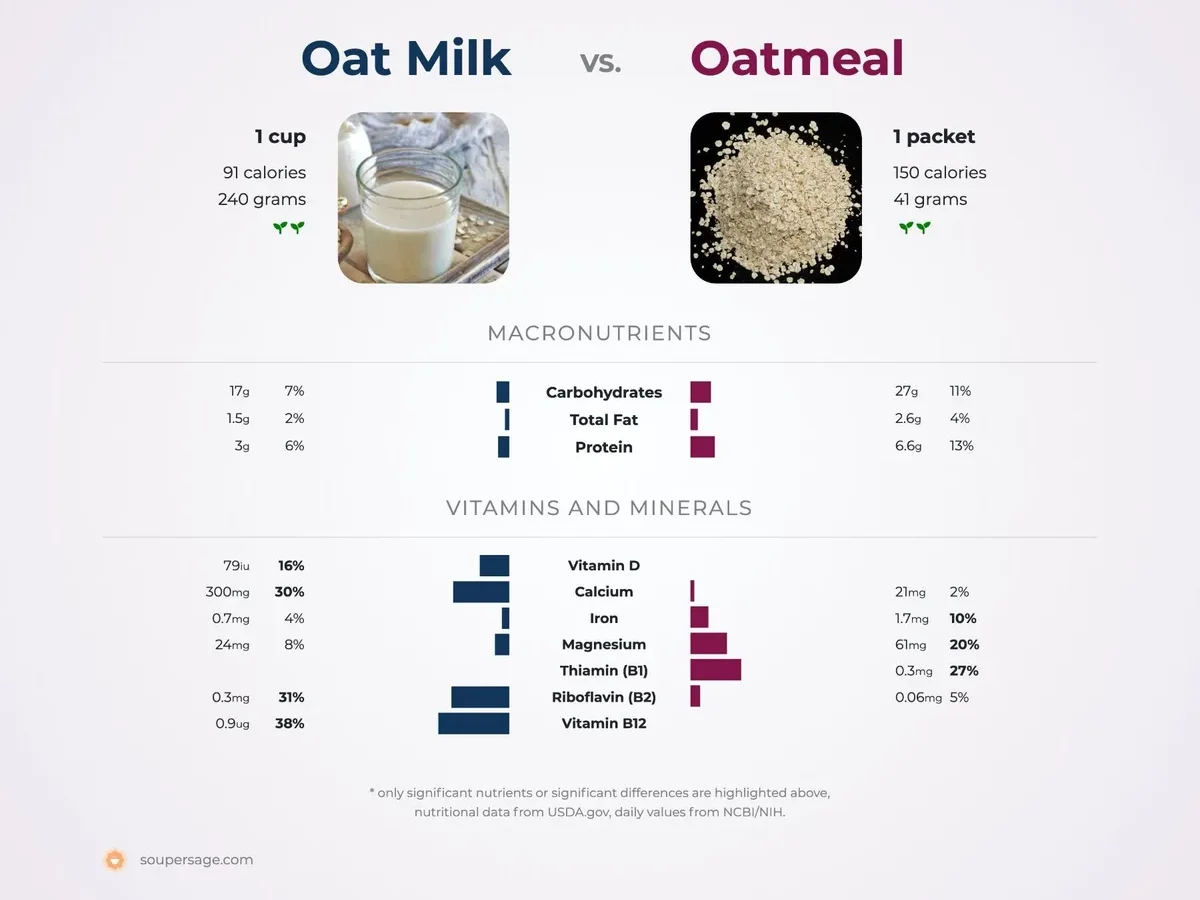
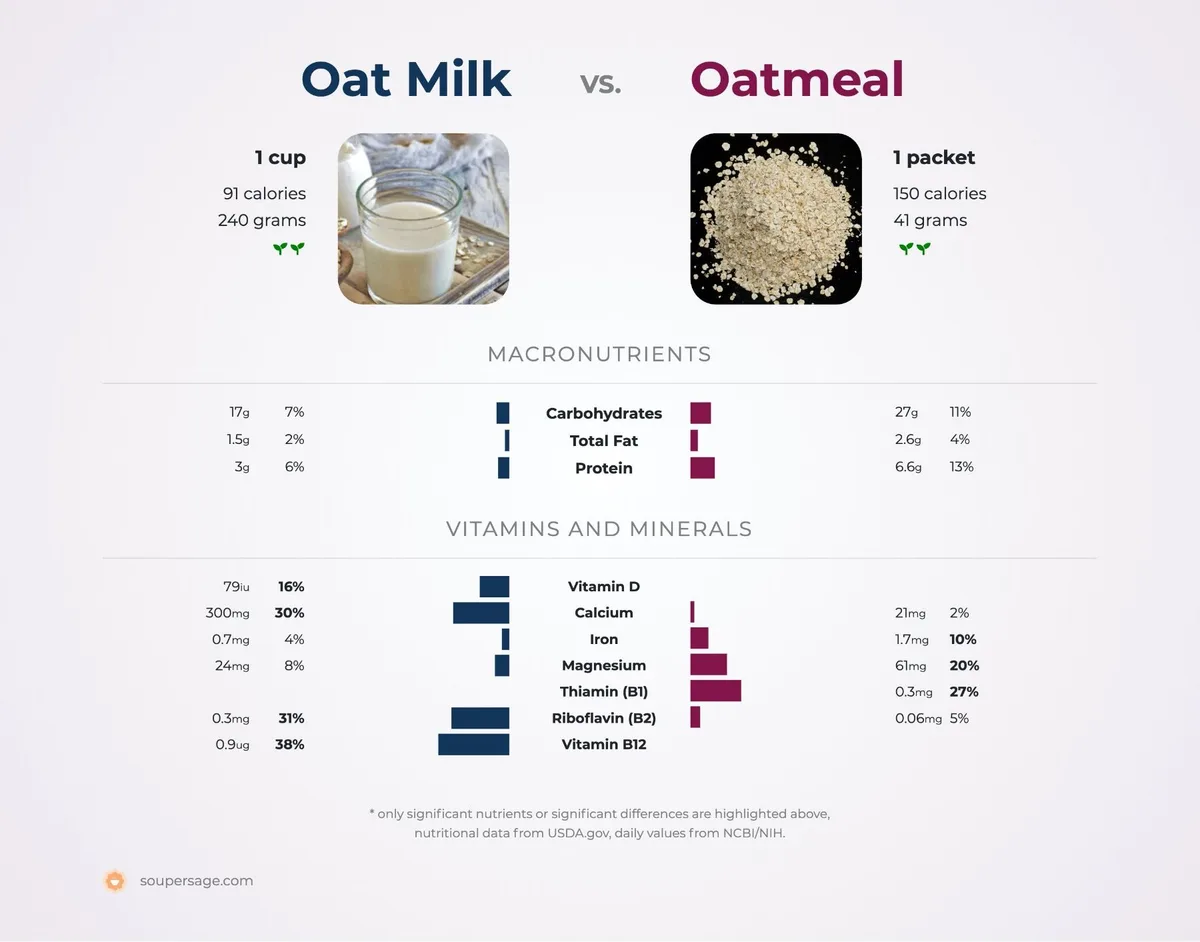
The answer usually comes down to one of two things. The milk isn’t formulated for foaming, or your technique needs a small adjustment. Most standard oat milk has 1, 2 grams of protein per cup, far less than dairy milk’s 8 grams.
Less protein means less foam structure. But barista blends are engineered to fix that. Let’s walk through the real reasons your oat milk is falling flat.
Quick Answer
Your oat milk won’t froth because of one of three things. The milk is too old and has separated. You’re using regular oat milk instead of a barista blend.
Or your steaming temperature is too high, above 160°F destroys the foam.
Fix it fast: use a barista oat milk. Keep it fresh, within 5 days of opening. Heat it to 145, 155°F only.
Submerge the steam wand tip just below the surface. That gives you silky microfoam in under 30 seconds.
Why Your Oat Milk Won’t Froth – The Real Problem
Oat milk is naturally low in protein and high in starch. When you steam it, the heat swells the starch and unfolds the proteins. That sounds promising.
But regular oat milk lacks enough protein to form a stable foam matrix. The result: thin, watery foam that collapses almost instantly.
Standard oat milk has 2, 3 grams of protein per 240ml serving. Dairy whole milk has about 8 grams. Without enough protein, the foam has no skeleton to hold air bubbles.
The bubbles just pop.
Barista oat milk changes the equation. Added oils, stabilizers like gellan gum, and sometimes pea protein boost the protein content to 3, 4 grams per serving. The formulation also includes 3, 4 grams of fat, which helps the foam stay smooth.
As of 2026, nearly every major oat milk brand offers a barista version. If you’re using standard oat milk, that’s likely your problem right there.
Temperature matters just as much. Oat milk curdles and breaks above 160°F. The proteins coagulate, the starch structure collapses, and you get watery liquid with curd-like specks.
Keep your steam wand below 155°F for best results.
Is It the Milk or the Frother? Two Main Paths to Check
Before you change anything, diagnose the variable. The decision tree has two main branches: milk type and freshness, or equipment and technique. Most people try to fix technique when the milk is the real culprit.
That wastes time.
Ask yourself these three questions:
- What oat milk am I using? Check the carton. Does it say “barista edition” or “extra creamy”? If not, you’re using regular oat milk.
- When did I open this carton? Oat milk separates after about 7, 10 days in the fridge. After day 5, the oats settle and the stabilizers weaken. Even barista blends lose foaming ability after a week.
- What frother am I using? A high-pressure steam wand (15+ bars) can handle regular oat milk if you’re careful. A handheld frother, French press, or jar method is much less forgiving. Low-pressure steam wands (on cheap espresso machines) often can’t create enough vortex for oat milk.
If you answered “regular oat milk”, “opened 8 days ago”, and “cheap steam wand”, you’ve already found the problem. For those with a borderline variable, barista blend that’s almost fresh on a decent machine, technique matters. The next two branches cover each scenario.

Branch 1: When the Milk Itself Is the Issue
Regular oat milk was never designed to froth. It’s meant for cereal, smoothies, and pouring into coffee. The formulation prioritizes shelf stability and a neutral taste.
Foam is an afterthought.
Check the ingredients on a standard carton: water, oat base, sunflower oil, salt, and maybe a gum. Protein content is low. The Specialty Coffee Association recommends milk with at least 3.5% fat and 3.3% protein for ideal microfoam.
Regular oat milk hits about 1.5% fat and 1.5% protein. That’s half of what’s needed.
The fix: switch to a barista oat milk. Look for one that says “barista blend” on the label. Brands like Oatly Barista Edition, Califia Farms Barista Blend, and Chobani Extra Creamy use added oils and pea protein to boost foam stability.
The protein content is still lower than dairy, but added starches create a thicker liquid that holds air better.
Even barista oat milk has a shelf life for frothing. Aggregate reviews and manufacturer specs indicate the first 3, 5 days after opening are the sweet spot. After that, the oats settle and the liquid becomes watery.
Shake the carton vigorously before each use. If you see visible separation or the milk pours thin, it’s past its prime.
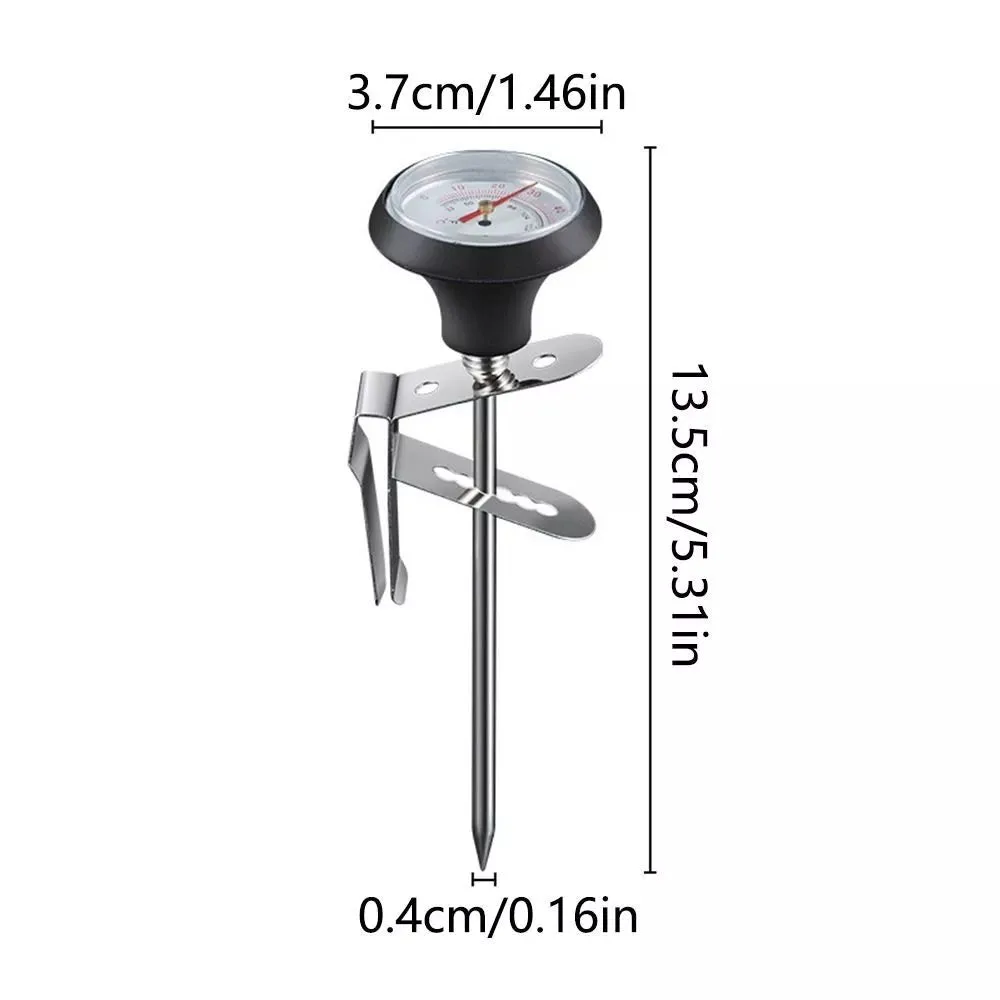
Temperature also matters. Never let oat milk go above 155°F. Use a thermometer.
If you don’t have one, touch the side of the pitcher, it should be hot but not burning. Above 160°F, the proteins scramble and the foam dies. You’ll see tiny curds.
That milk is ruined.
One more thing: homemade oat milk. It sounds great, but it almost never froths well. Homemade versions lack the stabilizers and protein boosters that commercial barista blends use.
Save your homemade oat milk for cereal.
Branch 2: When Your Technique or Equipment Needs Fixing
You have fresh barista oat milk within 5 days of opening. You’re using a decent espresso machine. Still no foam.
Now the problem is your technique or equipment.
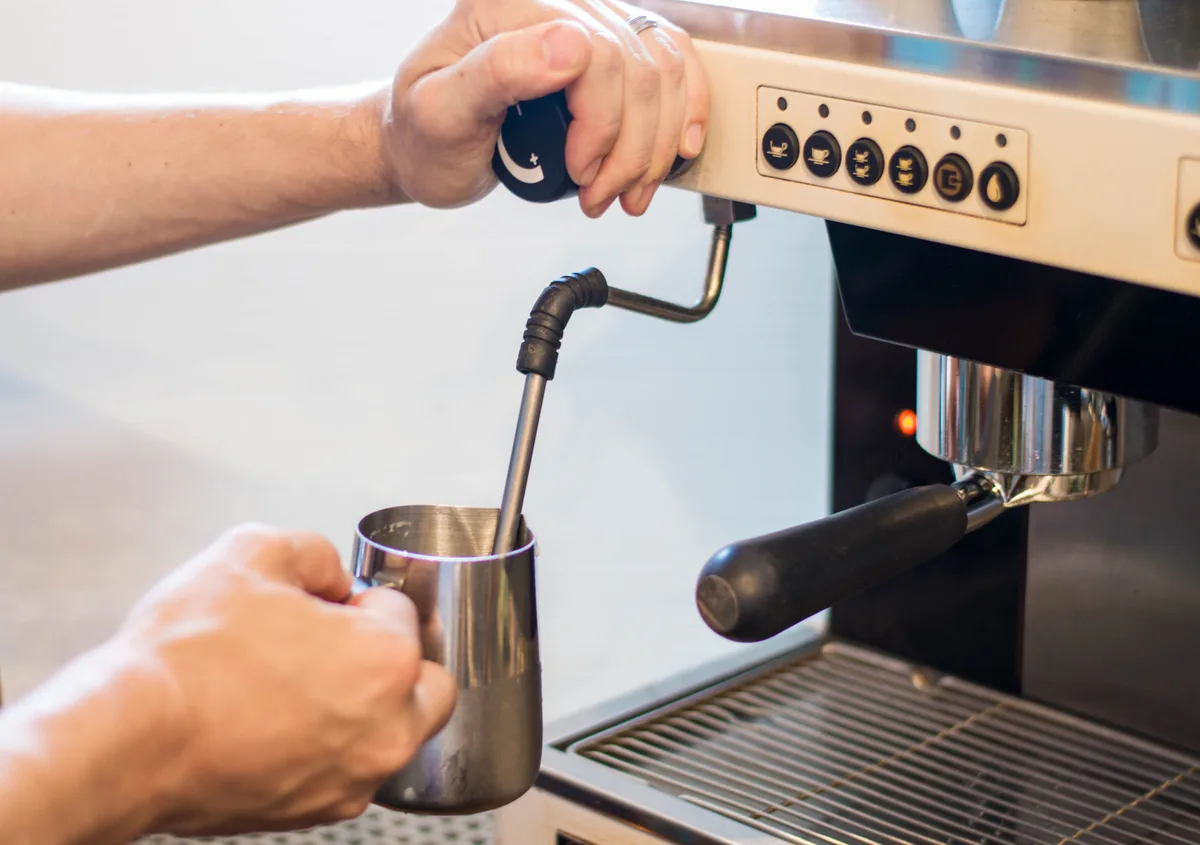
Steam wand position. The most common mistake. If the wand tip is too deep, you’re just heating the milk, no aeration. If it’s too shallow, you create big unmanageable bubbles.
The sweet spot: tip just below the surface, about 1/4 inch deep. You should hear a gentle hissing sound, not a violent tearing. That hiss means you’re pulling air into the milk.
Keep the wand at a slight angle, about 15 degrees off vertical. This creates a vortex in the pitcher. The vortex folds the bubbles into the liquid, creating a uniform texture.
Without the vortex, the foam separates from the milk.
Steam wand pressure. Prosumer espresso machines (Rancilio Silvia, Gaggia Classic Pro, Breville Dual Boiler) operate at 15+ bars. That’s enough for oat milk. Entry-level machines under $300 may only hit 9, 12 bars.
At those pressures, the steam is weak. It takes longer to heat the milk, giving time for the oat milk to break down. If you have low pressure, preheat the milk to 120°F in the microwave before steaming.
That reduces the time the wand needs to work.
Handheld frother users. These wands work best with milk already at 140, 150°F. If you start with cold milk, the wand struggles to create consistent foam. Warm the milk first, then froth for 15, 20 seconds.
Don’t go longer than 30 seconds, you’ll incorporate too much air, creating a stiff dry foam that separates.
French press method. Pour warm oat milk into a French press, then pump the plunger up and down rapidly for 30, 60 seconds. Start with milk already at 150°F. If you start cold, the milk warms too slowly and the foam collapses.
Use a metal mesh plunger, not plastic, plastic doesn’t create enough agitation.
Comparison table for quick reference:
| Frothing Method | Ideal Oat Milk Type | Temperature Needed | Time to Foam | Likely Outcome with Barista Oat Milk |
|---|---|---|---|---|
| Steam wand (high pressure) | Barista blend | 140–155°F | 20–40 sec | Silky microfoam |
| Steam wand (low pressure) | Barista blend (preheat to 120°F) | 140–155°F | 40–60 sec | Thin but drinkable foam |
| Handheld frother | Barista blend | 140–150°F | 15–20 sec | Stable foam, a bit airy |
| French press | Barista blend | 150°F | 30–60 sec | Small bubbles, moderate stability |
| Jar shaking | Any oat milk | 140–150°F | 30–45 sec | Weak, fast-collapsing foam |
If you’ve checked milk and technique but still fail, look at your pitcher. A stainless steel pitcher with a narrow spout creates a better vortex. Fill it only one-third full, that gives the milk room to expand and swirl.
Overfilling is a classic mistake.
One last equipment issue: scale buildup. Hard water deposits can clog the steam wand holes. Check for a weak, split stream instead of a steady jet.
If you see that, descale your machine following the manufacturer’s instructions. A clogged wand can’t aerate properly.
Common Frothing Mistakes That Sabotage Oat Milk Foam
Even with the right milk and good equipment, a few small errors can kill your foam. Here are the ones we see most often from aggregate user feedback.
Overheating. Number one cause. Oat milk hits 160°F and the proteins denature. The foam turns into thin liquid with curds.
Use a thermometer every time until you know the feel. The pitcher should be hot to touch but not painful.
Over-aerating. Introduce air for the first 5, 10 seconds only. After that, submerge the wand deeper to create the vortex and heat evenly. If you keep the tip at the surface for 20 seconds, you get giant bubbles that collapse instantly.
Not shaking the carton. Oat milk separates in the fridge. The oat solids sink. If you pour without shaking, you get watery milk on top and thick sludge at the bottom.
Neither froths well. Shake vigorously for 5 seconds before every pour.
Using a cold pitcher. A cold pitcher steals heat from the milk, slowing the steaming process. Run hot water over the pitcher for 10 seconds before you start. That keeps the temperature curve steady.
Waiting too long to pour. Oat milk foam settles fast. After steaming, tap the pitcher on the counter to pop big bubbles, swirl gently to mix, and pour within 30 seconds. If you let it sit, the foam separates and you get a watery latte.
Frothing expired milk. Oat milk that’s been open more than 7 days loses its ability to foam. The stabilizers break down. If your milk smells sour or looks separated even after shaking, buy a new carton.
Your Step-by-Step Frothing Decision Tree
Run through this list in order. Stop when you find the fix.
Step 1: Check the carton. Is it barista blend or regular? If regular, that’s your problem. Switch to barista oat milk.
If it’s barista, move to step 2.
Step 2: Check freshness. When did you open it? More than 7 days ago? Replace it.
Within 5 days? Shake the carton hard and move to step 3.
Step 3: Check temperature. Heat the milk to 145, 155°F. Use a thermometer. If you’re steaming with a wand, stop at 150°F.
If you’re using a handheld frother, warm the milk first to 140°F, then froth. If the milk goes above 160°F, dump it and start again.
Step 4: Check your frother. Using a steam wand? Submerge the tip 1/4 inch below the surface. Angle the pitcher 15 degrees to create a vortex.
If you hear a tearing sound, the tip is too shallow. If you hear nothing, it’s too deep. Adjust until you get a gentle hiss.
For handheld wands, ensure the milk is warm and froth for 15, 20 seconds. For French press, pump vigorously for 30, 45 seconds.
Step 5: Check the pour. Once steamed, tap the pitcher gently. Swirl to mix. Pour into your cup within 30 seconds.
If the foam separates during pouring, you over-aerated or the milk was too hot.
Step 6: If nothing works, descale your machine. Hard water scale clogs steam wand holes. Run a descaling cycle per your machine’s manual. Then try again with fresh barista oat milk.
Frequently Asked Questions
Why does my oat milk curdle when I steam it?
Oat milk curdles because the temperature went above 160°F. The proteins denature and the starches break down. Keep your steam wand or frother between 145°F and 155°F.
Use a thermometer until you know the feel.
Can I use regular oat milk for frothing?
You can try, but the results are poor. Regular oat milk has about 1.5 grams of protein per cup compared to 8 grams in dairy. It produces thin, watery foam that collapses quickly.
Barista blends add oils and pea protein for better structure.
How long does oat milk last for frothing after opening?
Barista oat milk froths best within the first 3, 5 days. After 7 days, the stabilizers break down and the oats settle. Shake the carton before each use.
If the milk looks watery or smells sour, replace it.
Why won’t my handheld frother make foam with oat milk?
Handheld frothers need warm milk to work well. Heat your oat milk to 140°F first. Then froth for 15, 20 seconds.
Don’t go longer than 30 seconds or you’ll get dry, stiff foam. Use barista oat milk for best results.
Can I froth homemade oat milk?
Homemade oat milk lacks the stabilizers and protein boosters found in commercial barista blends. It rarely produces stable foam. Save your homemade milk for cereal and use store-bought barista oat milk for lattes.
Does shaking the carton make a difference?
Yes. Oat milk separates in the fridge. The solids sink to the bottom.
If you pour without shaking, you get inconsistent liquid. Shake the carton vigorously for 5 seconds before every pour.
Next time your oat milk won’t froth, run through the decision tree. Nine times out of ten, it’s the milk type, freshness, or temperature. Fix those and you’ll get silky foam every time.

Similar Posts































